Showing posts with label Handmade Huggables. Show all posts

Handmade Wookiees Special Offer & Teetoo Christmas Cards


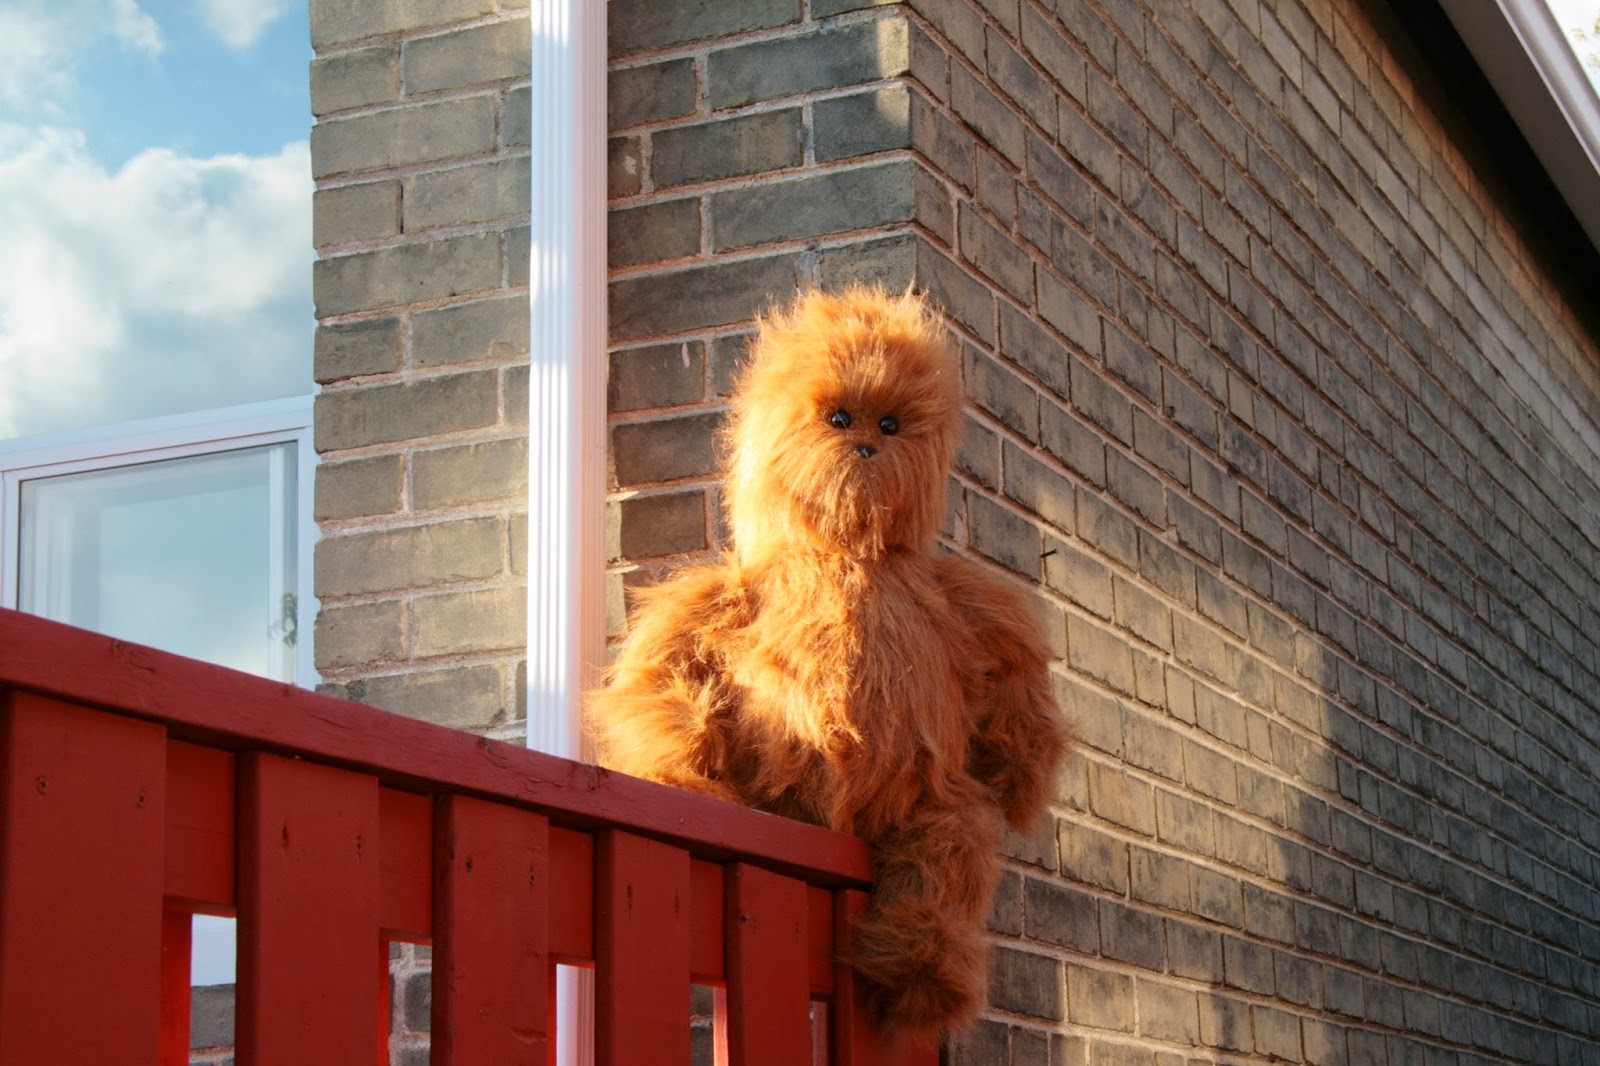
Hey! Just popping in to let you know that until midnight tonight I am offering a limited number of Teetoo Handmade Wookiees for $70 CAD off their regular price. Typically, I sell these for $350 CAD. Get yours today only for $280 CAD! These will ship on time for Christmas to the US and Canada. As of right now (10:30am EST), there are only 4 more available.


Also back in the shop are Teetoo Christmas Card Packs. Both the Bust a Move- Gingie design and Raccoon with Gift blank cards are available. Like all of my cards, these are printed on heavy white recycled content card stock and have a lovely smooth matte finish with an 1/8" border and come with matching envelopes.


If you are looking for something in particular from me for someone special this Christmas that you don't see in the shop, please Send Me an Email! Although time is running out, I may be able to accommodate you. 

Warmest wishes,
♥ Andrea ♥ 

Parting is Such Sweet Sorrow...


I saw these two troublemakers off this past weekend.

The last day to order a Hairy Beast of your very own and get him on time for Christmas if you live in the US is end of day tomorrow, Tuesday December 8th!

Also, there are still art prints of my old illustrations available in the Teetoo Society 6 Shop. Get 15% off and free shipping until midnight tonight.

Thanks everyone for your purchases and all the love! It feels great to be back in the shop :)

♥ Andrea ♥

Hairy Beasts Now Available in the Teetoo Etsy Shop!


It's taken me many months to complete this batch of Hairy Beasts. Thank you to those of you who have been waiting patiently, some of you for two years! There are only a few available, so if you've been thinking about ordering one, I recommend you purchase quickly as I will not have any more available for at least 6 months or so. But I do intend to make more and have already purchased the materials to do so. There will be some smaller ones in the next available batch as well.


Here is a link to the listing in my shop: Giant Hairy Beast

For those of you who are also hoping for a strap and bag, I have decided to make some of those available also. These will be completed and shipped out in January. If you would like to pre-order one (I will be making them based on the number of pre-orders I receive), please visit the listing here: Bag and Strap for a Hairy Beast

If you are located in the US or Canada, there is still time to get one of these on time for Christmas as they will be shipped expedited with tracking and insurance.

Also, you'll notice there's a bunch of other stuff in the shop now too! I'm finally back and ready to put some time back into Teetoo again. I've added six new baby stars and listed a few other things I have ready to ship.

Please send me an email if you have any questions!

Here are some hairy beast progress photos over the past few months...

About to jump into an ocean of fur

Sewing , watching Dr. Who and drinking margaritas- a few of my favorite things :)

Building the furry army

Twenty legs pinned and ready for sewing

A few of the cute furry faces in my storage room

♥ Andrea ♥

Hello & An Eyeball Pillow DIY

Hello! Long time no see, hey?

Receiving this adorable customer appreciation shot recently, inspired me to write a post. This is Rosie. Isn't she delightful?! I am thrilled to think about the adventures Rosie is going to have with her Furry Beast :)

Truth be told, I miss Teetoo. Over the many iterations of my life, I have found that I have swung back and forth between two loves; natural healing and art making/crafting. But I have yet to find a nice balance between the two. I have always found myself in a position where I felt I had to leave one for the other. At this time, I am very involved in my natural healing life as a homeopath and my full time work at the Canadian College of Homeopathic Medicine, but I would very much like to be sewing and drawing more than I have time to.

One thing I've been working up to do, is to make a big batch of Giant Sasquatches. I've had a lot of inquiries about them and I miss making them. I have no idea how long it is going to take me to get them done, but I am planning to do them this year. If you would like one and you want to have a better chance of getting one when the batch is available, you can either send me an email, follow the blog, like my Facebook page or follow me on Intstagram (andreateetoo). I will post to all of these places before I add the Sasquatches to the shop whenever that may be.

I thought I would share some photos from Instagram of a few projects I have worked on over the last year with you today. There aren't very many, but it is nice for me to document them here; for posterity's sake and in hopes of inspiring others to find more time to be creative.

The first two images are of a patchwork pillow I made for our bed several months ago. It was originally going to be a quilt, but I have learned that I am a crafter who likes to do a project that I can start and finish fairly quickly and though I've managed to make a few lap quilts over the years, I have yet to complete a full-sized quilt. In this case, I opted to turn the quilt into a pillowcase so I could feel good about actually completing something :)

The next project is a Halloween bunting I made from this Heidi Kenney Halloween Bunting Spoonflower fabric. This was a fun, quick and easy project. I put a star fabric on the back, so I can reverse it and keep it hung up in the living room the rest of the year. 

The illustration is a tree drawing for some friends who were married in September and wanted to make a Wedding Tree Guest Book. 

Over the summer, I made a lunch bag for my daughter, Winnie. I used the Quilted Lunch Bag pattern from the book, One-Yard Wonders. This is the second project I've made with this book and like the other one, The Folklore Bag, I found the instructions to be easy to follow and I am extremely happy with the final product.


This next project is something I made recently for my son, Eamon's, upcoming birthday in March. I saw an eyeball pillow for sale on ModCloth a while ago and thought he would love it. They don't have it in stock anymore, but I thought it would be fun to make my own anyway. So today, I'm going to give you the how-to so you can make your own eyeball pillow too.

Eyeball Pillow DIY

Materials

I used felt for this project. You will need some white and black felt and whatever colour you want for the iris, white thread, red thread, black thread and thread to match your iris colour, no-sew fabric glue and recycled polyfil.

Cut It Up

You can make this pillow in any dimensions you like. My pillow ended up being 12" around and 3.5" deep. For mine, I just found a top to a wicker basket that was a large circle and traced it for my template. It was approximately 12.5" in diameter and I cut two of these. You can use anything- a large serving plate would be a great option. 

Then I guessed on the proper depth of the pillow for that size of diameter and I went with 3.5", so I measured around the perimeter of my circle to make a strip of white felt that was about 4" x 40". Cut your strip a bit longer than the perimeter of your circle.

I found some other random round items to trace for the iris, pupil and white spot. My iris measures 6" across, my pupil measures 4" across and the white spot is a 1" circle.

Sew It Up

First take your iris and position it in the center of one of your large white circles (or off to one side if you like). Pin it down and sew it on with thread that matches the iris' colour. 

Then take your pupil and pin and sew it to the center of your iris, using black thread.

Now thread your machine with red thread and sew in some random veins. I just used a straight stitch and changed the direction every few stitches and tried to be as random as possible. To make the veins look  more realistic, sew a few of them so they split and make some of them span from the edge of the eyeball all the way to the iris and make some of them only span part way. 

Now take your long white strip and stitch one long side of it to the right side of the front of your eyeball. Your strip will be longer than the perimeter of your white circle, but don't worry about that. Sew right up until you meet the top of the strip and stop. 

Now take the other white circle that will be the back of your pillow and sew the other side of the pillow to the other side of your white strip (with right sides facing). Leave a little opening of about 5 inches before your strip end meets up with the front of the strip. Now clip around the edges of the seam allowance every 1/4" or so and flip right side out. 

At this point, I folded the end of my long strip under and laid the fold down as an edge onto the front of the white strip and with my machine I stitched the fold very close to the edge of the fold onto the front part of the strip so that it made a neat little seam. I left the five inch opening between the back of the pillow and the strip for stuffing. 

Stuff your pillow until it is nice and plump. You may have to do some pressing down and even punching here and there to make the pillow do what you want it to.

Now hand stitch the little opening at the back of your pillow.

Finally, use your no-sew fabric glue to glue your white spot down and you're done!

I hope you enjoy this little project!

If any of my directions are confusing, please leave me a comment and I would be happy to help and/or change my wording here to make it easier to understand.

Happy sewing! And hopefully, I'll post here now and then over the next few months. I've missed you!

♥ Andrea ♥

More Mr. Whiskers Photos


Hello there! How are you? We are all well. I have been very busy, but that is not a complaint. All the things I've been doing are things that I love to do.

One of the things I've been up to is making another Mr. Whiskers. We got up to a whole lot of fun with him, so I thought I'd share with you a few photos before I ship him off to Switzerland today.


I tucked him in last night for one last sleepover before his big trip abroad.

Besides Marvin, Mr. Whiskers is the coolest cat in town. But, I think it's clear that Marvin is a little jealous of Mr. Whiskers as you can see in this photo I posted on Instagram. If looks could kill, Mr. Whiskers would not have survived to catch his plane to Switzerland.

Have a great week!

♥ Andrea ♥

Mr. Whiskers


I wanted to make something really special for my sister-in-law for Christmas this year. My husband, Johnny, suggested a cat and drew a picture for me. Mr. Whiskers here, is what I came up with. I love this guy so very much!


My hope is to make up some DIY kits to sell in the Teetoo Etsy Shop. If you are interested in making a Mr. Whiskers for yourself, please let me know so that I can contact you when and if a kit for him becomes available. Oh, on second thought, I can't resist adding a new Mr. Whiskers made to order listing. Hopefully I'll get a kit in the shop too, but I really want to make another one of these guys!


His sweet little kitty paws are definitely one of my favorite things about him.


Lately, I've been relishing staying up way past my bedtime, snuggling with my cat, reading, dancing and being silly with the kids and watching more Sons of Anarchy than is good for anyone.

Have a fun weekend!

♥ Andrea ♥

Sasquatch in the Neighbourhood

I'm shipping off a new Sasquatch today! This hairy beast is off to North Carolina, USA. We had some fun together this weekend. He climbed fences and trees around the neighbourhood. You can take the beast out of the forest, but thankfully, there's no taking the forest out of the beast. I sure am going to miss this guy. Safe travels, hairy man!


Happy Monday! Enjoy your week.

♥ Andrea ♥

Shop Update: Note Cards, Sprites & Bites

 All of the new card sets are now available in the shop!

Fox in a Hoodie Note Card Set

Little Deer Note Card Set

Litte Crow Note Card Set


Butterfly Note Card Set

I have a bunch of Lucky Sprites ready to ship as well. And the new Giant Lucky Sprite and Giant Bite are also available ready to ship now too.

I've been pretty busy lately. Did I tell you that we are moving this summer? Much of my time these days is being taken up by the search for a new home. We still haven't found one.

And I've been busy over on my homeopathy site as well. Today I posted my first post in a very long time there, a juice recipe, Ginger Zinger. I also re-posted all of my raw recipes from here to there. Over the years I've found it difficult to decide how to divide up my interests and so the decision I've made is to do all of my healthy recipe posts over there from now on and use this blog to keep you posted on Teetoo updates and such here. If you like, you can sign up to my homeopathy and natural remedies blog by e-mail and get all of my posts in your in-box. There's a spot to sign up for that in the left side bar.

Anyway, although I've been busy, I've also stayed true to my promise to myself and have been getting lots of extra sleep and that has been wonderful.

I hope you're having a great week.

♥ Andrea ♥

Springtime Marketplace Preparations

Tomorrow's the big day! I'm so excited to be a vendor at the Toronto Etsy Street Team's, Springtime Marketplace! Here are a few things I will have for sale at my table.

A couple of new items that I am thrilled to share with you are, Giant Bites and Giant Sprites! The Little Bites and Sprites are so popular that I thought it would be fun to make big ones. I'm so glad I did. They are super cuddly.

This morning when the kids saw me taking photos of these guys they asked me to be in some photos with them. It's great to have some toy testers here at the house. The Sprites and Bites get a big thumbs up from the kidlets.

Something else I'm really proud of are the new sets of Teetoo cards I've created. If you've been following my blog for a long time, you may remember that I created cards to sell when I first opened Teetoo back in 2010. The cards arrived back from the printers the day before I had intended to open the shop and they were a complete disaster. Since then, I have sold the Teetoo Holiday Card Pack and the Send Love Mini Card Pack and I am really happy with their quality but I hadn't developed any more cards because I was so frustrated with that card debacle years ago. Recently, I decided that it would be nice to have some plain, inexpensive blank note cards on hand. I took a peek in a great little store in Hamilton that sells a nice assortment of cards and artwork by indie artists but I just couldn't find what I was looking for. In coming back to some of the artwork I created last year, I realized that I had just what I was looking for right here. I'll have all four new card packs for sale at the show tomorrow and I'll have them listed in the shop next week. I just love the way they turned out. They are simple and sweet. The colours are vibrant and the images have a lovely semi-gloss finish to them. They really are just what I wanted them to be.

I also took a few photos this week as I worked, to give you some peeks into my methods and procedures. I guess I worked pretty methodically, first I cut all the fabric for everything I was going to make. Then, I did all the sewing all at once. Finally, I hand stitched the closures and all the little details in the end. I'm still working on a bit of that today.

Baby Bee Buddy Rattles in production.


This is the stage in the Giant Sasquatch's production when I'm figuring out where to attach his eyes and nose before I attach his head to his body.

I tend to work all over the house when I've got a lot to do and lately I've been working in the family room instead of the studio. That way I can be with the family and keep an eye on the kids while I'm working. Plus, I need the space to spread out and have little stations for each job I'm working on.


Some new Baby Stars. These new Baby Stars are extra cute.
And I'll have a bunch of Baby Bee Rattles for sale.

I hope you'll come out and see me tomorrow at the TEST Springtime Marketplace at the Bathurst Centre for Culture, Arts, Media and Education, 918 Bathurst St. Toronto.

See you there!

♥ Andrea ♥

A Thoughtful Sasquatch


I just finished this Sasquatch yesterday. He was very fun to make and once he was all stitched up, I was very happy to get to know him a little bit. We spent some time together in the garden yesterday morning before he caught his train to Illinois  He is a quiet and thoughtful fellow and it was an absolute pleasure spending time with him. Forever curious and always up for an adventure, he really understands the value of taking the time to stop and smell the tulips, climb trees or just lay down in the grass, look up at the sky and daydream :)

♥ Andrea ♥