Showing posts with label Holiday. Show all posts

Screaming Cat Halloween Sewing Project


We're very excited for Halloween this Saturday! Here's a Halloween decoration I wanted to share with you that I made recently. It started out as a drawing based on screaming cats from vintage Halloween decorations, but after I started working on it, my husband John, thought it should be an homage to our sweet Marvin, who passed away this past spring. So, I added some white patches to his face.


If you would like to make this, I made a template that you can find here. I didn't include the white patches, because I figured that anyone wanting to make this, will just want to make a black cat and also the white patches are very finicky and might just be easier to freehand. 


Supplies
14" Embroidery hoop
Fabric to fit your hoop (I used quilt weight cotton)
Embroidery stabilizer
Felt- black, white, green, red, yellow (this is a great project for using up scraps)
No-Sew Fabric Glue
Green thread

Directions
To make this, print the template, cut each piece out of the paper template and then use it to make your felt pieces. When making larger and smaller shapes that are the same, I like to cut the small pieces first and then place them on top of a larger piece of the colour of felt I want underneath it and cut around the smaller one to make the larger pieces. I've given you a template only for the smaller shapes so you can do this. Use approximately a 2/8" allowance for this.

For the little specks of the light in the cat's eyes, trace the circular bottom of a small spool of thread or another small circular object to make a little circle and cut out of white felt. Then, carefully cut this into a tiny crescent.

Before starting to use your hoop, trace the outside hoop onto a piece of felt and cut it out. This is going to be your backing piece once you're done.

I used a quilt weight cotton and backed it with embroidery stabilizer before sewing the finished cat head to it. This ensured that the fabric didn't stretch and buckle while I sewed it. You may choose not to use stripes like I did, as keeping those lines straight makes this project more difficult.


Cut away your stabilizer around the back of your cat head and put the finished piece into the embroidery hoop. Cut the fabric one inch around the hoop and finish the back using the directions here. I suggested that you trace the outside of the embroidery hoop for the backing instead of the inside as recommended in the instructions in the link because I tried it the way that was suggested first and I found it really awkward to get the right fit on the back. So, for a slightly quicker finish, instead of stitching the back piece of felt onto the back, you can use a permanent fabric glue to glue the felt backing to the edges of your hoop, or if you choose to stick with her method and hand stitch it, just trim your edges slightly.

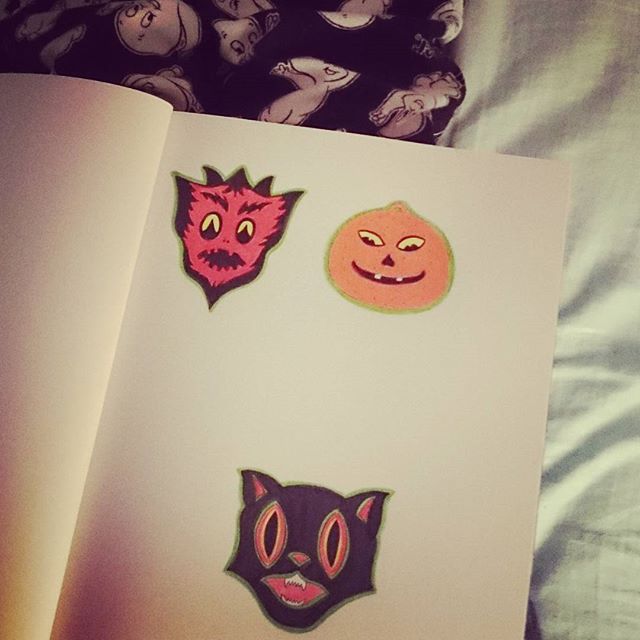
I hope to make a devil and Jack o lantern based on these other drawings I made of vintage Halloween decorations- maybe for next year.

Have a great Halloween! 
♥ Andrea ♥

Winter and Yuletidey Things


We've been having a lovely time over the past few weeks enjoying the first of winter and getting ready for Christmas. I purchased Heidi Kenney and Amanda Krueger's, A Very Merry Advent Guide, and used the cute printable Santa paper and envelopes for our letters to Santa. We've enjoyed a few of the projects in the guide too and I must add that my very favorite thing about it are the four Christmas music playlists. We've been playing them almost every day. My favorite new Christmas song by far is Santa Mouse. I'd love to link to it for you but I can't find the version of the song that is on the playlist anywhere. Do you know it? Cutest Christmas song ever.


We were so excited to get replies to our letters in the mail from Santa!


The house has gotten quite festive. I purchased a little tree and we found a few new additions to our vintage Christmas decorations collection at the thrift store.


Oh, and I bought some handmade pom poms and made a garland for our front window.


And I thought I should add a few left over pom poms to the wreath I made a couple years back.


The kids had fun decorating a gingerbread house with one of the lovely girls who care for them through the week after school.


And the weather has been a perfectly Canadian winter- lots of beautiful and cold snow and ice.


I've also been sewing a lot. I will share some of the projects that I've been working on soon.

Have a wonderful week and keep warm!

♥ Andrea ♥

Halloween Greetings! Carrot Cake Balls Recipe *raw vegan*


I hope you are enjoying your Halloween day! Halloween is my favorite time of the year. But, I do get a bit frustrated because unhealthy food seems to overshadow everything else on this most awesomest of days.

I just made a yummy, very healthy and Halloweeny raw vegan recipe today and I thought I'd share it with you. It is inspired by the carrot kake recipe in Jeremy Safron's book, The Raw Truth.


Carrot Cake Balls with Macadamia Nut Cream Topping

If you are going to soak your nuts and seeds (this makes the recipe more easily digestible by washing away the enzyme inhibitors that naturally occur in seeds and nuts, it also makes them blend more easily) soak your nuts and seeds over night before you are going to make this recipe. You can also juice a bunch of carrots and have carrot juice the day before because you will need the carrot pulp left over for your carrot cake mix.

Ingredients
1 1/2 cups macadamia nuts (soaked over night and rinsed)
1 cup sunflower seeds (soaked over night and rinsed)
1 1/2 cups dates (soaked for an hour- save the soaking water)
1/4 cup lemon juice
1 Tbsp. pure vanilla extract
1 cup carrot pulp (left over from juicing)
1 Tbsp grated lemon zest
1 Tbsp grated orange zest
3 heaping tsp pumpkin pie spice
1 Tbsp extra virgin olive oil
1/2 tsp sea salt
1/4 cup unsweetened shredded coconut
1/4 cup chopped pecans (I don't soak these because they add crunch to the cake)

To Make Topping:
In a blender, combine the soaked and rinsed macadamia nuts, 1/2 cup of the soaked dates, the lemon juice and vanilla extract and blend until smooth.

To Make Cake Balls:
Place soaked and rinsed sunflower seeds and the rest of the soaked dates in a food processor, add the olive oil and as much of the soaking water left over from the dates as you need to facilitate blending.
Once smooth, add this mixture to the carrot pulp.
Mix thoroughly and add all other ingredients.
Roll into balls and top with the macadamia nut cream sprinkled with some cinnamon.

This is a lovely healthy recipe that my kids love. I hope you like them too!

Happy Halloween!

♥ Andrea ♥